The lab is about creating a texture for a raptor model, as well as adding a skeleton to it and creating a walking cycle. We will use the model and the animation in the next homework.
Download the file, based on a model by Thingiverse.com user ClayRade:
and open it in Blender 4.2. In this part of the lab, we will unwrap the model and apply a texture to it.
Switch the object to Edit mode. To create a texture for this object, we need to unwrap it first, and for that we need to create some seams. These are lines in the model along which the model will be cut to be projected to a plane.
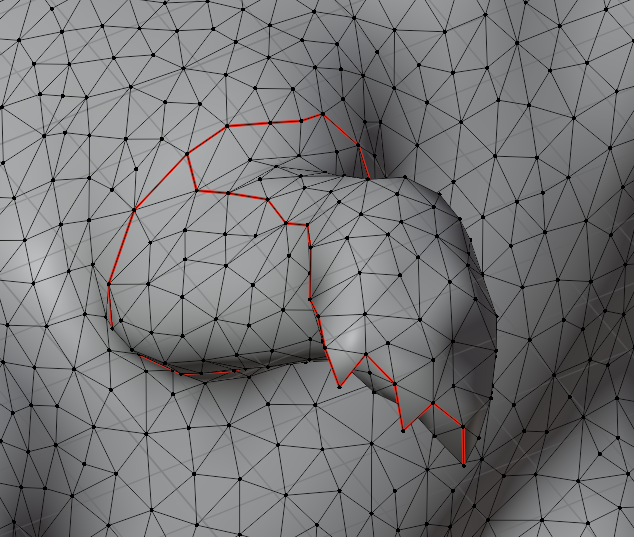
Let's select a loop around one of the arms. Starting with the arm on the left side in the front view, click on a point around the edge between the arm and the body. Then hold the control and click on a point a little further away. Blender will select all the vertices on a path from the first vertex to the second. Keep going this way, rotating the view to see the object better, until you have created a full loop around the arm.
Note: if you need additional edges as part of the seams you are marking, feel free to use the knife tool (K) to carve them out. To use the knife, hit K, click on each point where you want to make a cut, and hit Enter when you're done.
Similarly, connect the loop with the top point of the left-most claw. Apply Ctrl-E - Mark Seam to also mark this. Then mark another seam from this point at the top of the left claw to the top of the right claw. Try to avoid cutting a triangle off completely. The idea is to be able to unwrap this arm flat. Here is what the arm should look like:

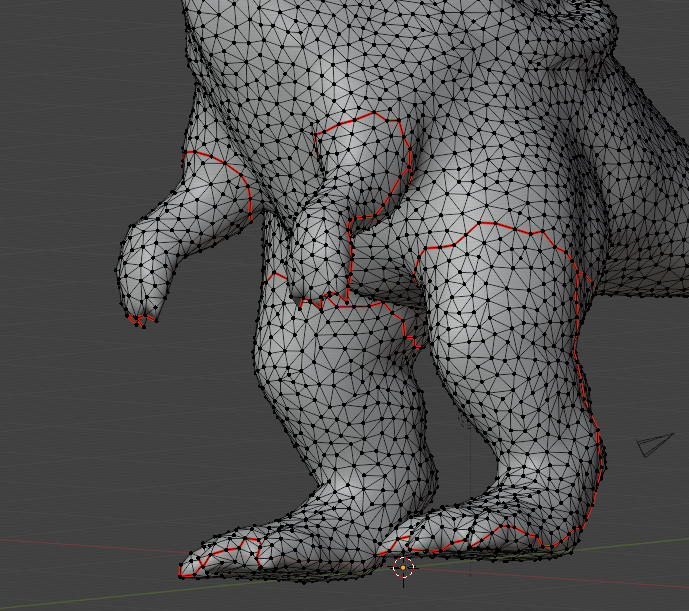
Repeat the operation on the other arm an on the two legs. Here is the model with all 4 paws marked out:
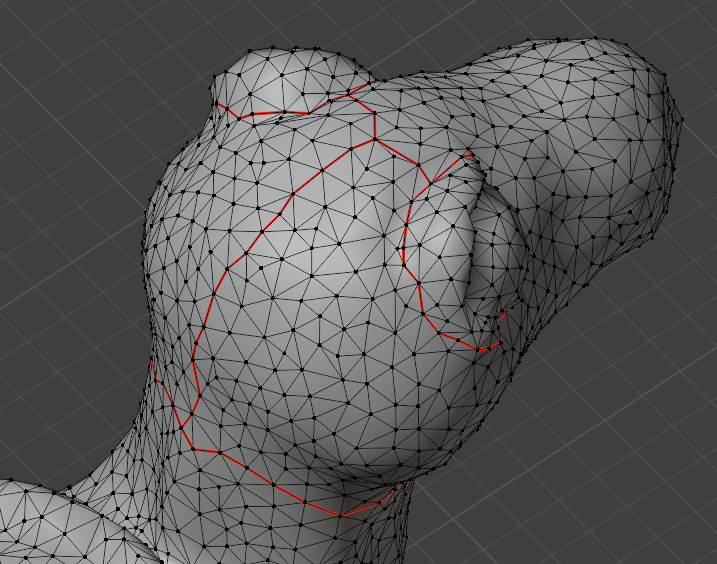
Mark another loop around the creature's backpack and around the neck. Mark out the eyes by another couple of loops. Then for the head, mark a line starting from the back and going to the top of the head, and then connect it across to the two eye loops. Here is a view of the marked head:
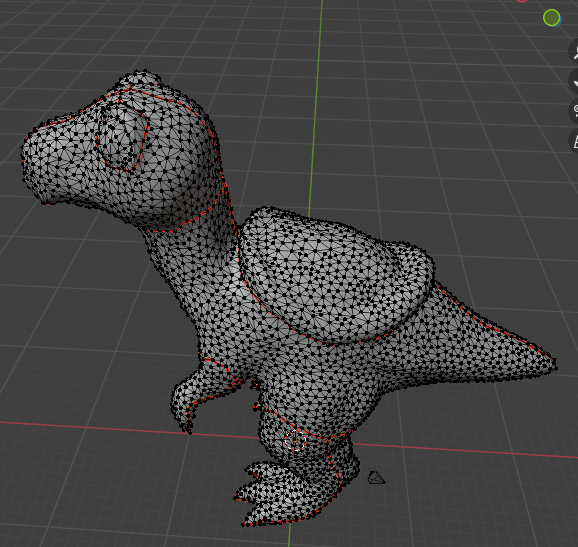
Now for the body, connect the neck loop with the backpack along the shortest distance, and then mark another line from the backpack towards the end of the the tail. Also mark a seam going the other way and splitting the nose in two so we can identify it and paint it better. Here is a view from the side of the whole body:
Still in Edit mode, hit A to select all the points in the surface. From the UV menu in the top toolbar (second row), select Unwrap. Then from the top toolbar (top row), click on UV Editing to switch to a layout where you can edit the UV unwrap better. You should see something like this on the left:
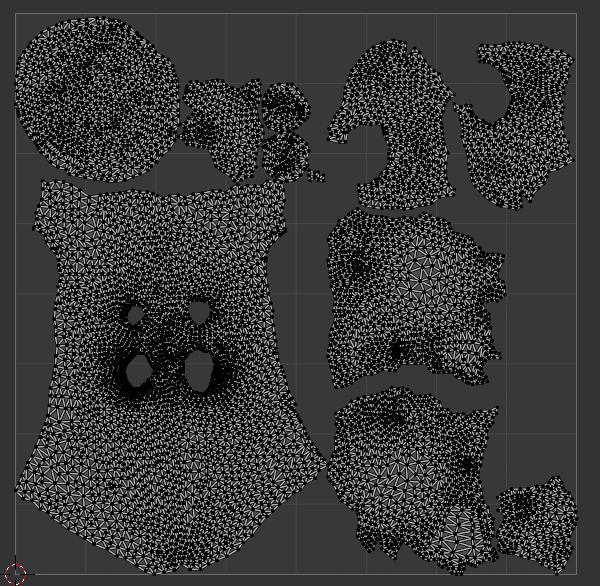
We'll call this the UV Map. It is composed of several groups (connected components) called islands.
In the top-left corner of the left side of the window, there are 4 buttons for the selection type: vertex, edge, face, and island. Click on the island one. Now you can click on an island and use G to move it, R to rotate it, and S to scale it. Move the islands around a little to create a better spaced our arrangement. Make sure they don't touch each other, and leave a little space next to the border of the map.
Now, let's identify the pieces. On the left side, to the left of the vertex selection button, there is a button showing two arrows that shows "UV Synch Selection" when you hover over it. Click on this button. Now the whole map should be selected. Click outside of it to deselect everything. The 3D mesh on the right should also be deselected.
As the island selection is not available in this mode, it has probably reverted to vertex selection. Change the selection type to lasso on both sides. Now you can use the lasso to select a region on one side and see where it is mapped on the other side. Use it to identify the eyes, the nose, the claws, and any other feature you'd like to know where it is.
On the right side, in the vertical toolbar on the right, select the Render button. Switch the Renderer from Evee to Cycles.
Hit A again on either side to select everything. On the left side, from the UV menu, select Export UV Layout. Give it the name "raptor_map.png" and save it in the same folder as the object itself.
Minimize the Blender window and look in the file explorer to the folder where you saved the raptor map file. Open the file with the Gimp, or Adobe Photoshop, or MS Paint, or your favorite image editor.
Add another transparent layer to the image where you'll add color to the layout. Place the layer containing the layout on top of the other one, and reduce its opacity to around 70% so that you can see the color below.
Use a large brush to paint over each island with a background color. Then you can add details with smaller brushes. For example, the eyes can be more detailed, the mouth, the nose, the claws. Paint the backpack in a nice color that stands out from the body. Here is an example of the resulting image, with the layout layer still in place. You can spend more time on your own to refine these details. In general, it's a good idea to let the color spill over the island borders to make sure all of the mesh is covered.
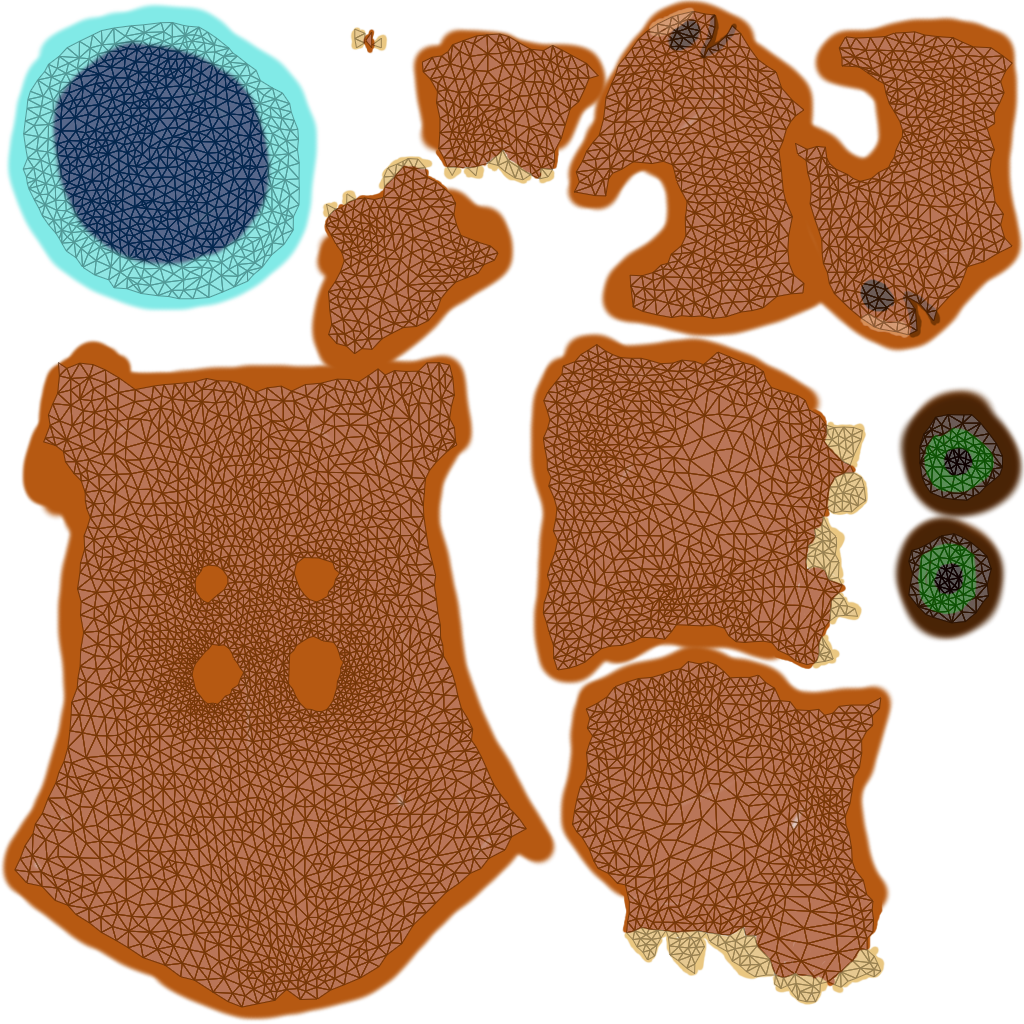
When you're happy with the result, hide or delete the layout layer, leaving just the color layer, and save or export the image under the name "raptor_texture.png".
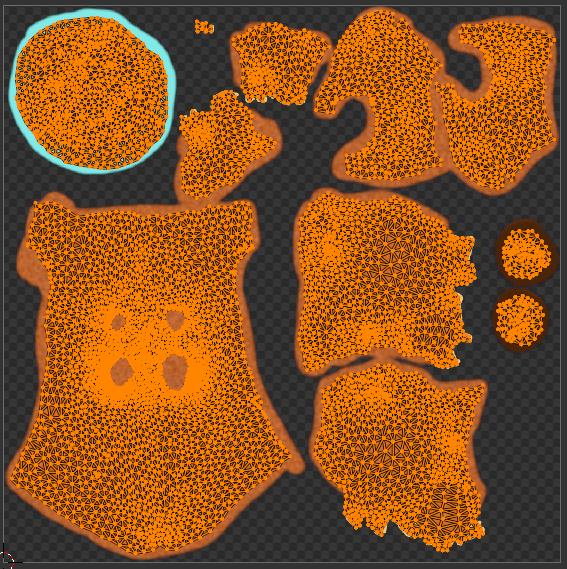
Coming back to Blender, make sure you're still in Edit mode. Hit A to select the entire object. On the left side, in the top left corner, to the right of the box showing "Untitled", click on the button Open Image. Select the image raptor_texture you have created. The image should be loaded and superimposed on the layout like this:
You can switch back to Layout in the top toolbar. Switch Object Mode. In the toolbar on the right, click on the Material button and add a material to the object. Make sure that the object has a single material applied.
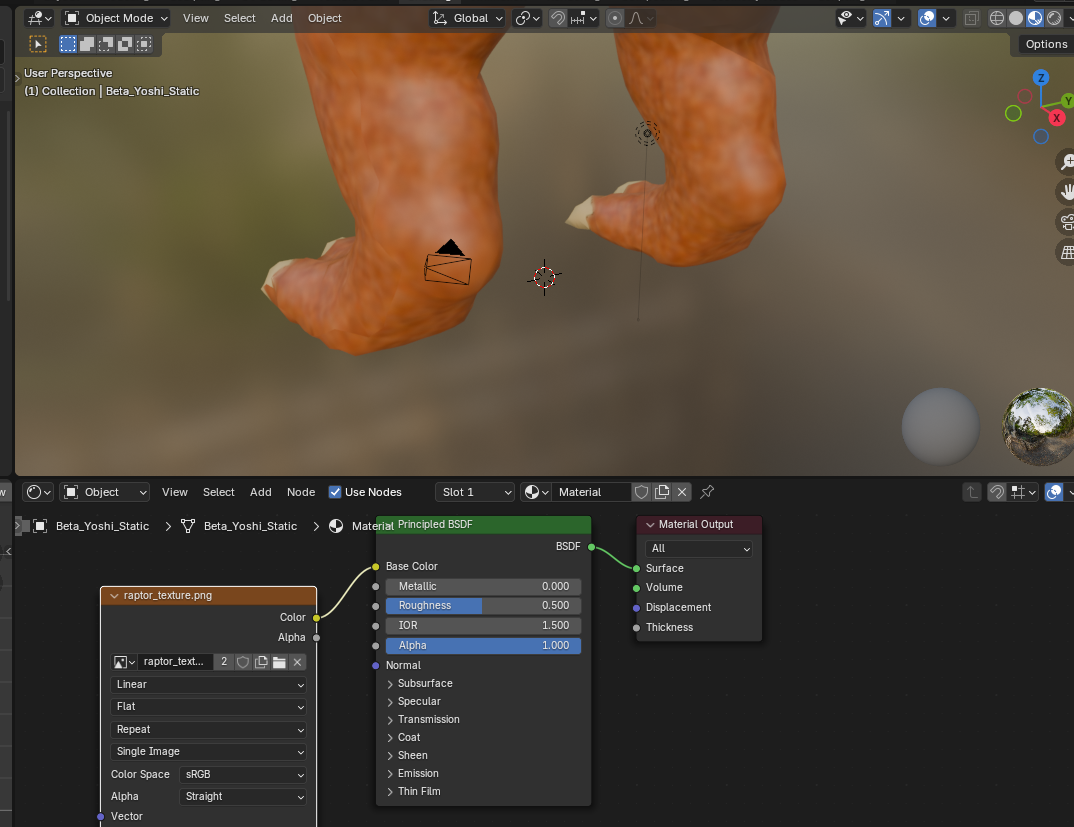
Then click on Shading in the top toolbar. From the menu at the bottom, add a node of type Texture - Image Texture. Place it somewhere before the material node. Click in the node box to open an image and select the file raptor_texture.png. Then draw a connection between the UV output of the new node and the Base Color of the material. The object should change colors when you do that:
Switch back to Layout in the top toolbar and click on Viewport Shading button in the top right corner of the window to see the full raptor with the applied texture. Save the file, and for now, we are done with the texture part.
Note. If you want to make changes to the texture image afterwards, after you save the texture file again from the image editor, you can can go back to the UV Editing layout and just reload the image from the Image menu. This will apply the changes to the object. You can also use the Texture Paint layout to edit the texture file directly in Blender. You should save it after editing if you want to use this tool.
This will be continued in Part B.