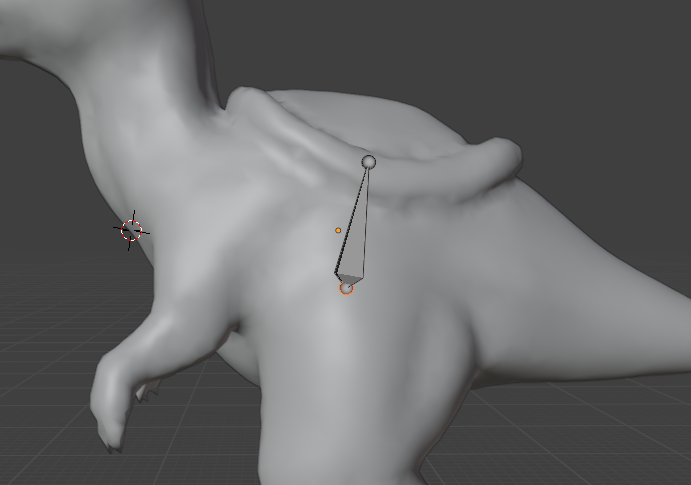
In this part of the lab, we will add a skeleton to the raptor that will allow us to animate it.
You can continue with the object you created in Lab 7 A, or download the files raptor_text.blend and raptor_texture.png. Open it in Blender. In this second part, we will add a skeleton to this creature and animate it in the next part.
Switch the object to Edit Mode. Hit A to select all the points in the object. Switch to the Top view (Z) and hit R to rotate the object. You can expand the rotation properties in the bottom left corner and enter -90 for the angle. Click outside the object to deselect everything. Switch back to Object Mode. Now the front of the object should be aligned with the Front view.
Make sure that you are back in the Layout editor. It will probably be easier to work without the distracting colors on the object. In the top right corner, switch the display to Solid (to the right of the wireframe button).
Switch to the Front Ortho view from the View menu, or -Y in the gizmo. Click on the target tool (Cursor) in the left vertical bar, then click somewhere in the middle of the body to set the anchor point there (it looks like a target). Then from the Add menu, select Armature. This should add a bone. Now in the vertical toolbar on the right, click on the Object button, expand Viewport Display, and check the box In Front. This way, the bones will always be visible on top of the object.
Switch to the Right view (X) and click on the Move tool on the left. Pull the bone along the green axis (Y) towards the center of the object.
With the bone selected, switch from Object Mode to Edit Mode. Click to select the top sphere of the bone (the joint), then G to pull it up towards the spine of the raptor, like below.

Switch to the Front view and move the two spheres so that the bone looks vertical and symmetrical.
In the Right view, with the top joint still selected, hit E to extrude it, then place the upper joint of the new bone at the base of the neck. Extrude it again towards the base of the head, then again towards the center of the head, and once more towards the tip of the nose. The result should be like this:
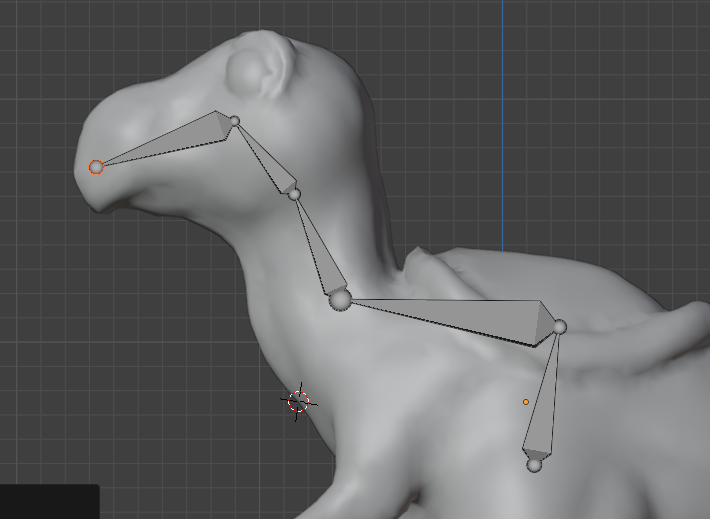
In the Front view, hit A to select all the bones, then S to scale them, X to constrain the scale over the X axis, then bring the cursor close to the center. After you click, you can set the X scale to 0. This will align the bones vertically with each other. Then you can hit G and position them symmetrically in the center of the object.
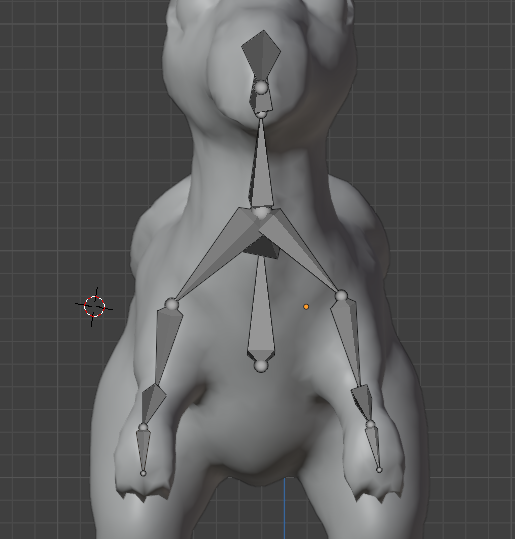
Click to select the joint at the base of the neck. Switch to the Front view, then hit E to extrude it towards the left shoulder. Extrude it again towards the left elbow, then the wrist, and then the center of the left hand. Use the front view to align these joints better. Repeat the procedure on the right side. Here is the result:
Select the center joint again (the first one). In the Front view, extrude it towards the left hip. Then in the Right view, extrude it towards the knee, then heel, then the pad, then toes. In the front view, fix their horizontal placement. Then repeat the procedure with the right leg:
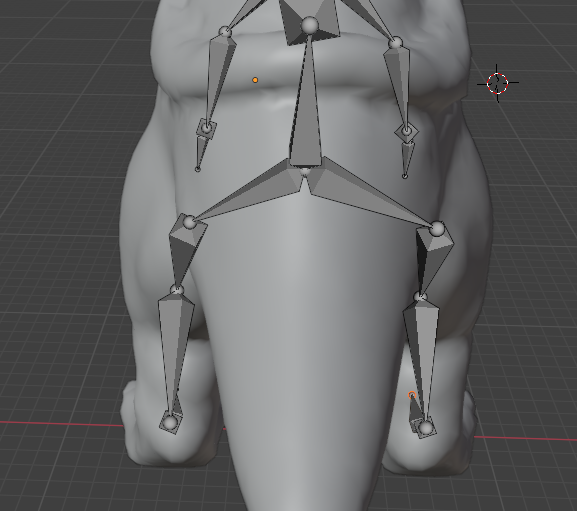
Select the center joint again. In the Right view, extrude it towards the start of the tail, then the center of the tail, and then the tip. Here is a view of the full skeleton:
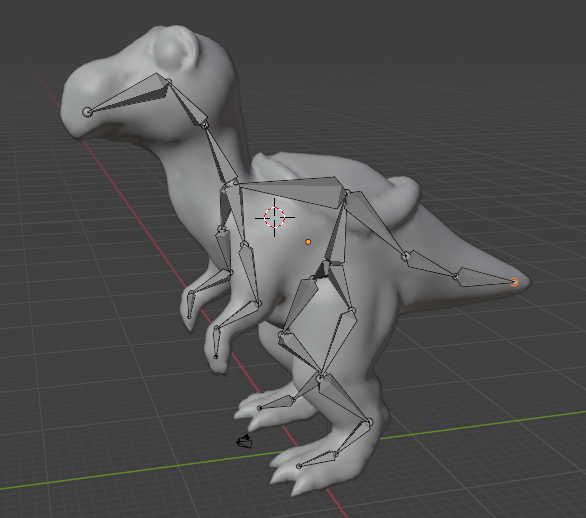
Still in Edit mode, click on the first bone to select it (not the joint). In the right-hand side vertical panel, click on the Bone button. At the top of the panel, replace the name "Bone" with "body". Rename the other bones as spine 1, spine 2, neck, head, face, shoulder_L, shoulder_R, arm1_L, arm1_R, arm2_L, arm2_R, hand_L, hand_R, leg1_L, leg1_R, leg2_L, leg2_R, foot1_L, foot1_R, foot2_L, foot2_R. It's important for Blender that symmetric bones have the same name with the _L and _R added to them.
After naming the bones, we need to check their dependencies. In Edit mode, click to select the head bone. In the toolbar under the Hierarchy on the right, click on the Bone button. In the Relations area towards the bottom of the right-side panel, make sure that the body bone is its parent. Verify a few of the other bones to make sure they are as expected.
Then click on the left hip bone. Because it started from the bottom of the body bone and not from the top, it doesn't have a parent. Click on the parent box and select the body bone from the list. Do not check the Connected box (or you can try to see what happens - you can undo it afterwards). Do the same for the right hip. The other bones should already have the right parents.
For the skeleton to work, we need to pair it first with the mesh of the raptor itself. Switch back to Object mode. Click on the raptor to select it. In the top right corner of the window, you'll see a list/hierarchy of objects in the scene. You can rename it there as Raptor or Yoshi.
With the raptor selected, Shift-click on the Armature, then hit Ctrl-P to pair them. A menu will open. Choose "With Empty Groups" from it. In the hierarchy, now the mesh will show as part of the armature (its child).
The weight paint determines which part of the mesh is influenced by each bone. Red is the strongest influence and dark blue no influence at all. Then the amount of influence varies with the color in between.
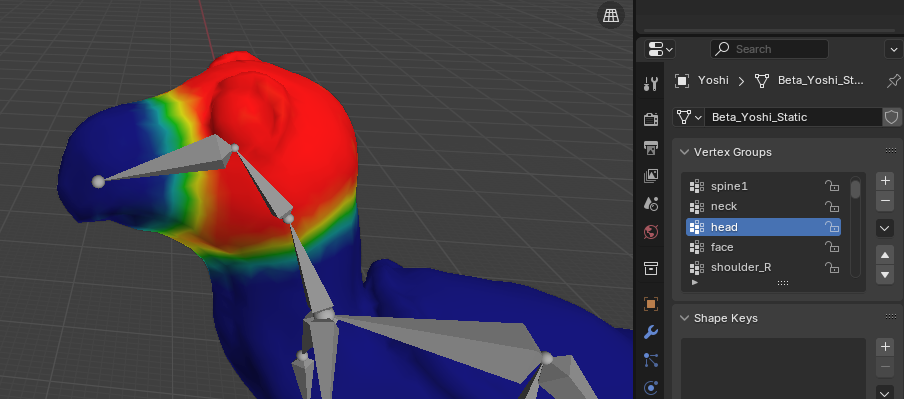
Deselect everything, then select the mesh. Switch from Object mode to Weight Paint mode. Then in the right-side vertical toolbar next to the inspector, click on the Object Data Properties button (it looks like a triangle) and then in Vertex Groups in the inspector, click on the head bone. Paint the area of the head around the bone in red. You will have to switch from Front to Back and maybe Top to be sure the entire head is covered. You can try selecting faces or vertices to see which works better. After that, use the blur brush to blend the border areas.
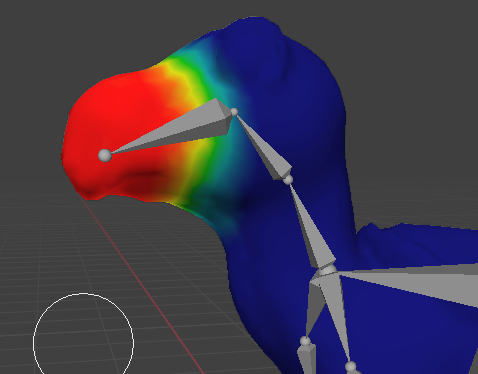
Then in the Vertex Groups, click on the face and paint the nose of the raptor in red. Then use the blur brush to smooth out the edge between red and yellow and between light and dark blue.
Then select each of the remaining bones and paint the area around it. Here is an example of the different bones and what they should cover:
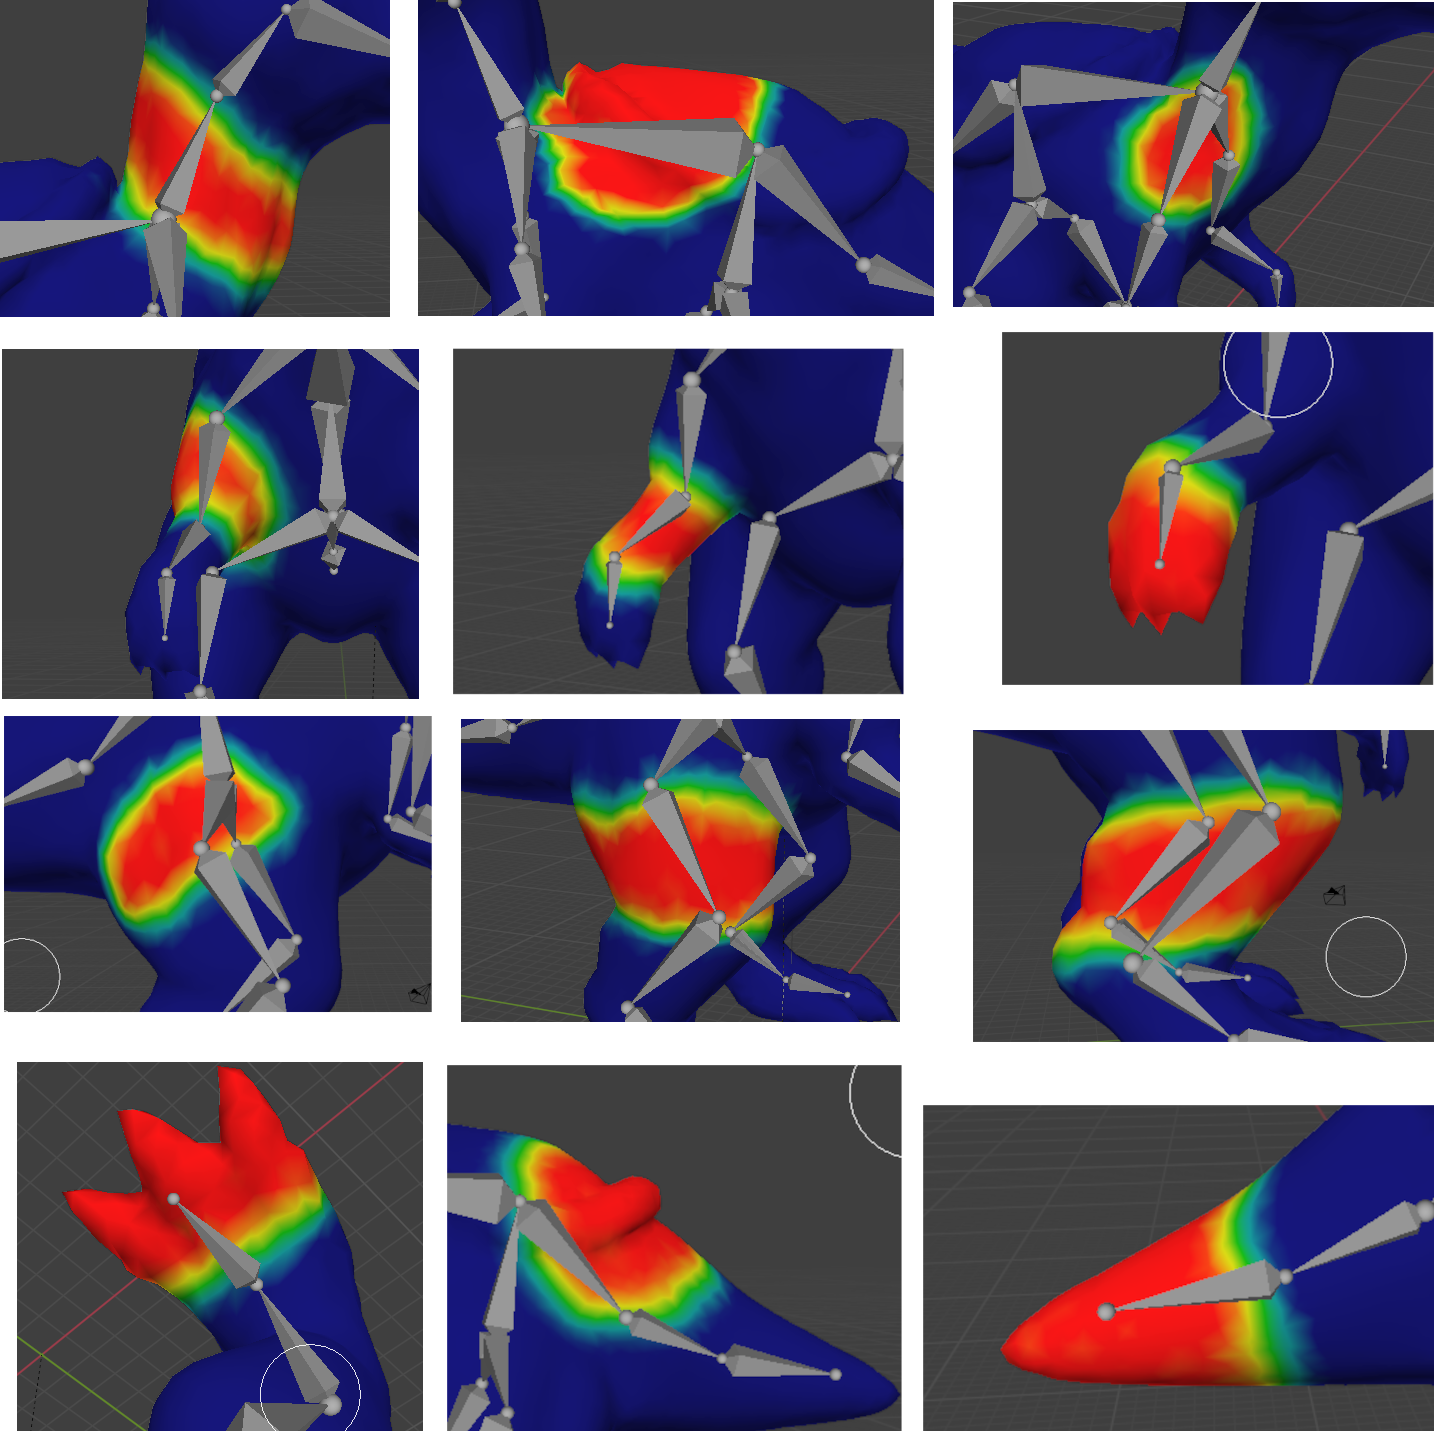
Finally, select the body bone and paint a strip across the back.
This will be continued in Part C.